Wednesday, July 30, 2008

Indonesia's (ICT) Statistics

In this post, I just want to archive some statistics, in particular those with regards to telecommunication / ICT development in Indonesia. If it is not explicitly mentioned, the values are valid as of Q1/2008.

ICT statistics (KOMINFO):
  • Wireline telephone subscribers : 8,758,096
  • FWA (limited mobility) subscribers : 9,069,827
  • Mobile subscribers : 81,834,590
  • Internet subscribers : 2,543,649
  • Internet users : approx. 10 times of the number of Internet subscribers
  • Fixed broadband subscribers/users : approx. 241,000 (ADSL, Cable, WiFi Hotspot -- actually it shall be more!)
  • Mobile broadband subscribers (3G, 3.5G, ...G :-)): 5,500,000 (??)
  • Density: PSTN-->3.89%; FWA-->4.03%; Mobile-->36.39%; Total-->44.31%
  • 182 ISPs (only 43 active -- number of subs. as mentioned above)
  • Computer penetration : 0.01-0.05% (less than 5 PCs / 100 households)
  • Thousands of public Internet kiosks (Warnet)
Players/Telco : (KOMINFO)
  • PSTN : Telkom, Indosat, Batam-Bintan Telekomunikasi
  • FWA : Telkom, Indosat, Bakrie Telecom
  • National long distance (SLJJ) : Telkom, Indosat
  • International long distance (SLI) : Telkom, Indosat, Bakrie
  • GSM & 3G : Telkomsel, Indosat, Excelcomindo, HCPT, NTS
  • CDMA : Sampoerna (STI), Mobile-8, Smart Telecom (Sinar Mas)
General country statistics : (KOMINFO/www.datastatistik-indonesia.com)
  • Area : 1,905,11 sq. km
  • Population : 224,904,900
  • GDP : USD 467 billion (USD 2,053 each)
Submarine Cables

Posts related to submarine cables:

Links to All Posts

October 2008
September 2008
August 2008
July 2008
March 2008
February 2008
January 2008

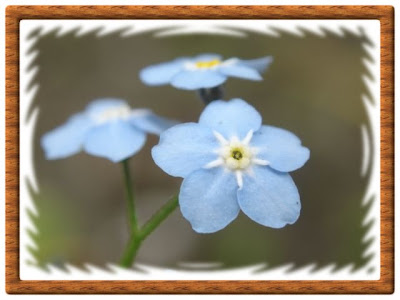
Classical Photo Frame + Quickmask

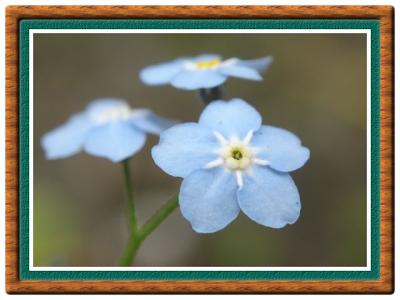
The classical frame can be combined with other effects e.g. the simple quickmask applications given by Zach Beane at the GIMP's site. Note that in this case, you have to only deal with a single layer ("layer4" in this post).

Steps
  • On the layer, create a rectangular selection then press the quickmask button
  • Apply [Filters]-->[Distorts]-->[Waves] then [Filters]-->[Blur]-->[Gaussian Blur]
  • Uncheck quickmask; [Select]-->[Invert Selection] and finally [Edit]-->[Clear]
You may also use [Filters]-->[Noise]-->[Spread] to get a different effect. Note that if you read the above mentioned Zach's tutorial, my experiments using GIMP 2.4.6 on Windows platform, the filters [Distorts]-->[Newsprint] and [Blur]-->[Pixelize] can not be applied to quickmask (??).

Credits
gimp.org | Zach Beane (xach-at-gimp.org)

Note GIMP 2.4.6

Monday, July 28, 2008

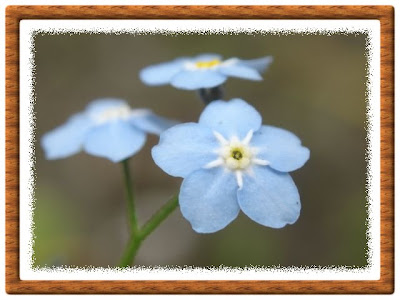
Classical Photo Frame

The frame, as you can see above, intensively uses masks and bumpmap filters. It might be several other ways (for the rough steps given below) to produce equivalent effects.

Steps
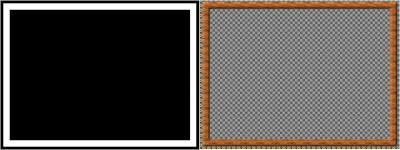
  • Create a new layer and draw the outline for frame (white over black); then blur it a bit (e.g. 10 px); name it "layer1" and make it invisible
  • Create a new white layer and fill it with "Wood #1" pattern; name it "layer2"
  • On "layer2" apply [Filters]-->[Map]-->[Bump Map] (bumpmap=layer1; depth=5)
  • On "layer1" [Edit]-->[Copy]; activate "layer2" then "add layer mask" (white); click this mask and [Edit]-->[Paste] (anchor it if necessary)
  • Still on the mask of "layer2", apply [Colors]-->[Levels] (input level 0;0.25;100)
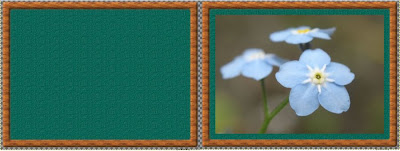
  • Create a new white layer and fill it with a pattern; name it "layer3"; continue with "Add Layer Mask"; you have to make a mask where the the boundary of the rectangle is within the filled area of "layer2"; make sure that "layer3" is positioned below "layer2"
  • Now [File]-->[Open as Layers] and select your favourite picture; name this "layer4" and place between "layer2" and "layer3"; as in the step before, add a layer mask so that the visible area of "layer4" is a bit smaller than that of "layer3"
  • As the final step, you have to select the boundary of the visible area of "layer4" then [Edit]-->[Stroke Selection] on a new transparent layer (placed above all previous layers)

Note
GIMP 2.4.6

Sunday, July 27, 2008

Text / Logo (3)


Steps
  1. Create a white layer; name it "layer1"
  2. Apply [Filters]-->[Render]-->[Clouds]-->[Solid Noise] (x/y size 2.8; detail 1; tileable)
  3. Apply [Colors]-->[Auto]-->[Stretch Contrast] and [Filters]-->[Blur]-->[Gaussian Blur]
  4. Select "Golden" gradient and continue with [Colors]-->[Map]-->[Gradient Map]
  5. Make some text with the text tool; add a new white layer below this; merge both layers; name it "layer2"; apply [Colors]-->[Invert] and [Filters]-->[Blur]-->[Gaussian Blur]
  6. On "layer1" apply [Filters]-->[Light and Shadow]-->[Lighting Effects] (bump and env. active; maximum height 0.02)
Variations
  • linear, spherical, logarithmic or sinusoidal bumpmap
  • [Colors]-->[Curves] adjustment on "layer2"
  • different environment maps
  • different gradients

Credits
gimp.org | Simon Budig (simon.budig@unix-ag.org)

Note
GIMP 2.4.6

Saturday, July 26, 2008

Text / Logo (2)

To produce the effect as shown below, I basically follow, to the most part, the guidance from gilberto@artmaster, except for some adjustment related to the current GIMP version.


Steps
  1. Use the text tool to add some text; name it "layer1"
  2. Duplicate "layer1"; add a new white layer below this; merge both layers; name it "layer2"; apply [Filters]-->[Blur]-->[Gaussian Blur] (15 x 15)
  3. Create a grey layer (#989898); name it "layer3" then [Filters]-->[Map]-->[Bump Map] (bumpmap=layer2; invert bumpmap; depth 7 ); select the "Three_bar_sin" gradient; continue with [Colors]-->[Map]-->[Gradient Map]
  4. Activate the gradient tool; create a new layer and fill it with the "horizon 2" gradient; name it "layer4"; apply [Filters]-->[Map]-->[Displace] (x disp. and y disp. 20 "layer2" wrap)
  5. On "layer1" select "alpha to selection" then [Select]-->[Grow] (5 pixels) and [Select]-->[Invert]
  6. Select "layer3" then [Edit]-->[Clear]
  7. Select "layer4" then [Edit]-->[Clear]
  8. Make sure that "layer3" is at the top of "layer4"; set the mode of "layer3" to "Overlay"
An improvement is possible at step 5: select the text object after a light blur.

Credits
wingimp.org (gilberto@artmaster.com.br)

Note
GIMP 2.4.6

Greenfoot Slides

Several times ago, I've made some introductory slides about programming Java using Greenfoot framework. The links are below. Actually, I've announced it in the Greenfoot mailing list as well.

Approximately, at the end of July, I was informed that the book is delivered to the market. Well, it might not cover all aspect of Java programming in Greenfoot, but at least my book is released before the official Greenfoot book by Michael Koelling and Paul Henriksen. But don't worry, the book is for local readers only :-)

Vectorization

Inkscape provides many nice tools for vector-drawing. One of my favourites is to convert bitmaps to SVG vectors using just a few clicks :-)


Steps
  1. Open/import the image;
  2. Select the image, then [Path]-->[Trace Bitmap]
  3. You might do some experiments with the parameters / options e.g. multiple scans with colors, single scan with color quantization etc.


Note
Inkscape 0.46

Friday, July 25, 2008

Text / Logo (1)


Steps
  1. Use the text tool to add some text;
  2. Add a new white layer below the text; name it "layer1"
  3. Merge the text to "layer1"; continue with [Colors]-->[Invert] and [Filters]-->[Blur]-->[Gaussian Blur] (5 to 10 pixels, depends on image resolution)
  4. Add a new white layer; apply [Filters]-->[Render]-->[Clouds]-->[Plasma]; name this "layer2"
  5. On "layer2", apply [Filters]-->[Map]-->[Bump Map] (bumpmap="layer1")
  6. On "layer2" add a white layer mask
  7. Copy the whole image of "layer1" to the mask of "layer2" (anchor if necessary)
  8. Make "layer1" invisible; add a new background layer (white or with some color); name it "blayer"
  9. On the mask of "layer2"; apply [Colors]-->[Levels] (input levels 0|0,25|100 - adjust as necessary)
  10. Duplicate "layer2", name it "shadow"; select "apply layer mask"
  11. On "shadow" select "alpha to selection" then [Edit]-->[Fill with FG Color] (Black); if necessary [Filters]-->[Blur]-->[Gaussian Blur]
  12. Adjust the opacity to something around 40-50%; then move "shadow" some pixels to the right and downwards
  13. If you want to have a 3d background as in the picture above, just create an irregular object below "shadow" and do something similar to the steps 4-9
  14. If necessary, you could also self-bumpmap the "plasma" (or whatever) layer to have a more interresting effect
Note
GIMP 2.4.6

Credits
gimp.org | Jens Lautenbacher (jtl@gimp.org)

Thursday, July 24, 2008

Brush & Selection Tools

Brush and selection tools belong to the most important tools in GIMP (agree??). The pics below show a visual overview for these groups of tools.


Brush Tools
With brush tools, you can choose the brush types, configure the colors and start drawing on the canvas by "repetitive click", "click and drag", or "click & shift+click". The last operation is used to draw a straight line. Below are some examples.


Selection Tools
With these tools you may work only on a certain part of the image. Selection can be done as simple as primitive shapes (rectangle, ellipse) or their derivative (using certain "operations" with the selection - union, intersect etc.) to more complicated and automatically "scriptable" ones. Additionally you might stroke the selection to obtain interesting effects.


Credits
gimp.org | Seth Burgess, Francisco Bustamante Hempe

Rusty Metal Effect

Intention
This post describes a method to produce "rusty metal" effect in GIMP.


Steps
  1. Draw an object in transparent layer or search here for your favourites; name it e.g. "object" layer
  2. Apply [Filters]-->[Noise]-->[Spread] (hor. 5, vert. 5 - depends on your image size)
  3. Duplicate the "object" layer, name it "objcopy"
  4. On "objcopy" layer, apply [Filters]-->[Blur]-->[Gaussian Blur] (e.g. 5x5)
  5. Create a white layer, name it "bumpobj"; then merge it with "objcopy" (right-click, merge down)
  6. Create a new white layer; name it "plasma"; apply [Filters]-->[Render]-->[Clouds]-->[Plasma] then [Colors]-->[Desaturate]; continue with bucket fill (color #ff8f07, opacity 80, mode multiply, Fill whole selection)
  7. Select "plasma" layer, apply [Filters]-->[Map]-->[Bump Map] (bumpmap=plasma; adjust depth parameter)
  8. Select "plasma" layer, apply [Filters]-->[Map]-->[Bump Map] (bumpmap=bumpobj; invert bumpmap, adjust depth parameter)
  9. Select layer "object" then apply "alpha to selection"; [Select]-->[Grow] (1 pixel); [Select]-->[Invert]
  10. Select layer "plasma", apply [Edit]-->[Clear]
Credit
wingimp.org (gilberto@artmaster.com.br)

Note
GIMP 2.4.6

Wednesday, July 23, 2008

Mask Variations

Intention
This continues the previous post and shows variations which can be achieved using different masks.


Steps
  1. Open the image; name it e.g. "original" layer
  2. Duplicate the "original" layer, name it "var1"
  3. Apply a "color" effect to var1 e.g. [Colors]-->[Invert] or [Colors]-->[Desaturate]
  4. Right-click "var1" layer choose "Add Layer Mask" (use white color for the mask)
  5. Click/activate the mask and apply one of the followings:
[Filters]-->[Render]-->[Pattern]-->[Checkerboard]
[Filters]-->[Render]-->[Pattern]-->[Grid]
[Filters]-->[Render]-->[Pattern]-->[Line Nova]
[Filters]-->[Render]-->[Pattern]-->[Sinus]
...

Note
GIMP 2.4.6


Color Migration

Intention
This post describes a simple effect to produce images with (discontinuous) color variations, as can be seen below.


Summary
We basically use several layers containing the original image and the modified images. This may or may not involve masks.


Steps
  1. Open the image; name it e.g. "original" layer
  2. Select an area on the image whose color you want to change; continue with [Edit]-->[Copy]
  3. Add a transparent layer; name it e.g. "var1" layer
  4. Click/activate "var1" layer, then [Edit]-->[Paste]
  5. Apply a "color" effect to var1 e.g. [Colors]-->[Invert] or [Colors]-->[Desaturate]
  6. Repeat the steps 2-5 to make another "discontinuity"
  7. You may also do the steps above with masks: duplicate the "original" layer, name it "var1a" then apply step 5; right-click "var1a" layer choose "Add Layer Mask" (use white color for the mask); apply step 2; activate the mask on "var1a" layer; fill the selection with black color (e.g. [Edit]-->[Fill with FG Color])
  8. If you want to have a smooth transition between colors, try [Filters]-->[Blur]-->[Gaussian Blur] on the mask
Note
GIMP 2.4.6

Tuesday, July 22, 2008

Photo Frame : Heart

This shall be my first post that addresses something different than all my previous posts. I've decided to "free" myself on what I have to write in this site :-)

It is about a simple trick to make a photo frame in GIMP (GNU Image Manipulation Program). Most of you might be already familiar with Photoshop; GIMP basically does the same thing, more-or-less. See here if you want to know more! The picture at the left shows the result.

Follow the steps below to produce the frame! Note that the menu-sequence used here is according to GIMP 2.4.6 which may differ with that in the previous versions.

Step 1
Open the images as layers ("leaves" for the background, "heart" for the frame master -- you can also produce the frame master directly within the GIMP, however my favourites are to look for some nice PNGs with transparent backgrounds on this site)


Step 2
On the layers window right-click the frame master layer then select "alpha to selection". Activate the background layer, press the quickmask button (as shown) and continue with blur e.g. [Filters]-->[Blur]-->[Gaussian Blur]

Then deactivate quickmask and continue with:
[Select]-->[Invert] and [Edit]-->[Clear]


Step 3
Add a transparent layer at the top ([Layer]-->[New Layer]); we call this the top layer. On the layers window right-click the frame master layer then select "alpha to selection". Activate the top layer, continue with [Edit]-->[Stroke Selection] then select "Stroke with a paint tool". Make it sure that you have configured the brush as indicated below.


For a better visual effect, add new transparent layer just below the top layer (we call this top shadow). Right-click the top layer then select "alpha to selection". Activate the top shadow, continue with [Select]-->[grow]. Choose a value to grow the selection, say 5 or 10 pixels; set your favourite (foreground) color and continue with [Edit]-->[Fill with FG Color].

Merge the top layer, top shadow, and the background (leaves) layer. The frame shall be now ready for your photos :-)


Soft-Brain is now Harewos.Telecom !

Please visit my new 'home' : Harewos.Telecom

Google It!

Creative Commons License. August 2008